This guide describes the steps necessary to configure the TCP/IP protocol within MacOS X for use on the University Data Network.
- Click on the Apple icon at the top-left of your screen
- Choose the System Preferences menu item.
- Choose Network.
- Choose Ethernet from the left hand menu.
- Select the TCP/IP tab.
- In the ‘Configure IPv4’ drop-down, choose Using DHCP..
- In the ‘Search Domains’ you see quns.cam.ac.uk.
- Click the Apply button.
- In the IP Address section, you should see an IP Address beginning with 10.64.x.x
- Exit from the System Preferences window.
Your computer is now configured for use on the College network.
Open a web browser and type in any web site address.
Our Firerack system will intercept your request, and you will see the following page
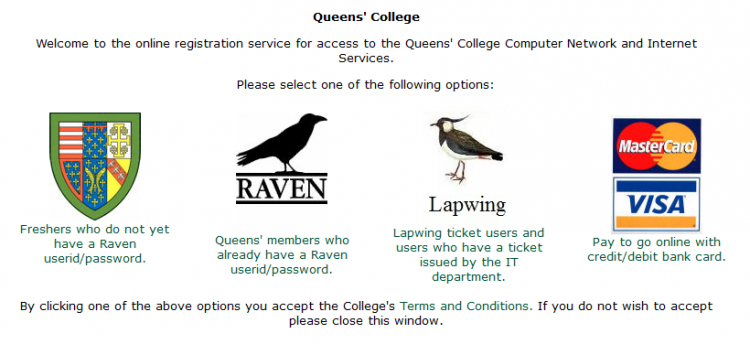
For new students, click on the Freshers Icon to collect your passwords.
If you already have your passwords, click on the RAVEN icon.
Log-in with your Raven account to register with Firerack.
Firerack will issue you with an IP address for use on the College Network, this address will stay with you until either you leave College accommodation with supported Etherent socket or you no longer wish to use the College Network.
When you complete the registration process and can connect to the Internet, do a Software update to give your computer maximum protection.
To ‘Update your Computer’, click on the Apple Icon and choose “Software Update”
Once your computer has been updated, unless you already have one, you will need to install an Anti-Virus program.
McAfee Anti-Virus is free to use while you are studying in Cambridge and can be installed from the USB stick you received, or it can be downloaded from here http://www.ucs.cam.ac.uk/support/anti-virus/macdownload